Tutorial 2 - Command mode (Function Set)
Before you power the circuit up, please take a microcontroller chip out of the circuit. You should see the black dim light appears on the first line. If you cannot see it, adjust the potentiometer with a screw in order to make the line more notiable. If nothing happens, you need to check the layout right and make sure that the you connect the LCD module properly.

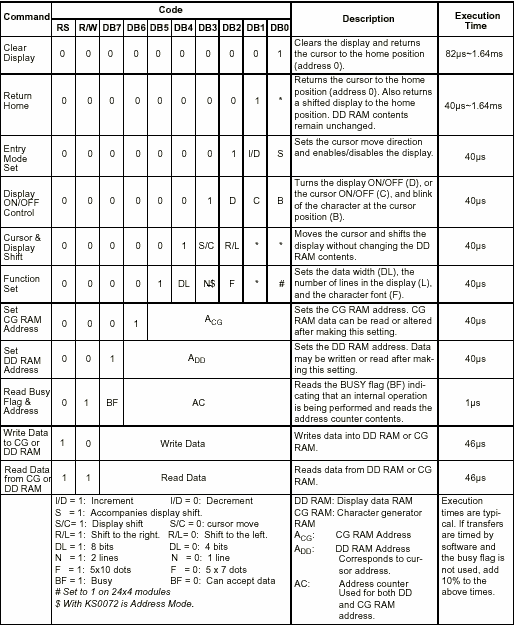
Since you are going to control the LCD module with 8 bits and use 2 lines and 5x7 format.. According to the sixth row of command control codes table, you need to configure the function set by setting hexadecimal number as 0x3B. Please be aware that 'x' represents don't care so in this case you are going to use 1 instead of 0.
In your first example code, you need to set both RS and RW to logic zero. Then you set the enable high, generate delay for microseconds and turn the Enable off. Remember that from Port 3.0 to 3.2 are used as RW, RS and Enable respectively while the 8 bits are used in Port 0 which denotes as DATA.
void main()
{
// Set 8 bits, Line 2 and 5x7 format
RW=0;
RS=0;
DATA=0x3B;
ENABLE=1;
Delay_Loop(5);
ENABLE=0;
}
RS=0;
DATA=0x3B;
ENABLE=1;
Delay_Loop(5);
ENABLE=0;
}

Hey presto, the LCD module will automatically display 2 lines. Is it pretty simple stuff eh?
No comments:
Post a Comment